In the SenHOME app, a plain beige wall and a simple bed setup became a bedroom concept with a patterned wall, a light rug, and a seating area. It began with a reference photo in warm cream tones. The design offered two different positions for the bed and armchair, so it was possible to compare which arrangement suited the room within the same 3D model.
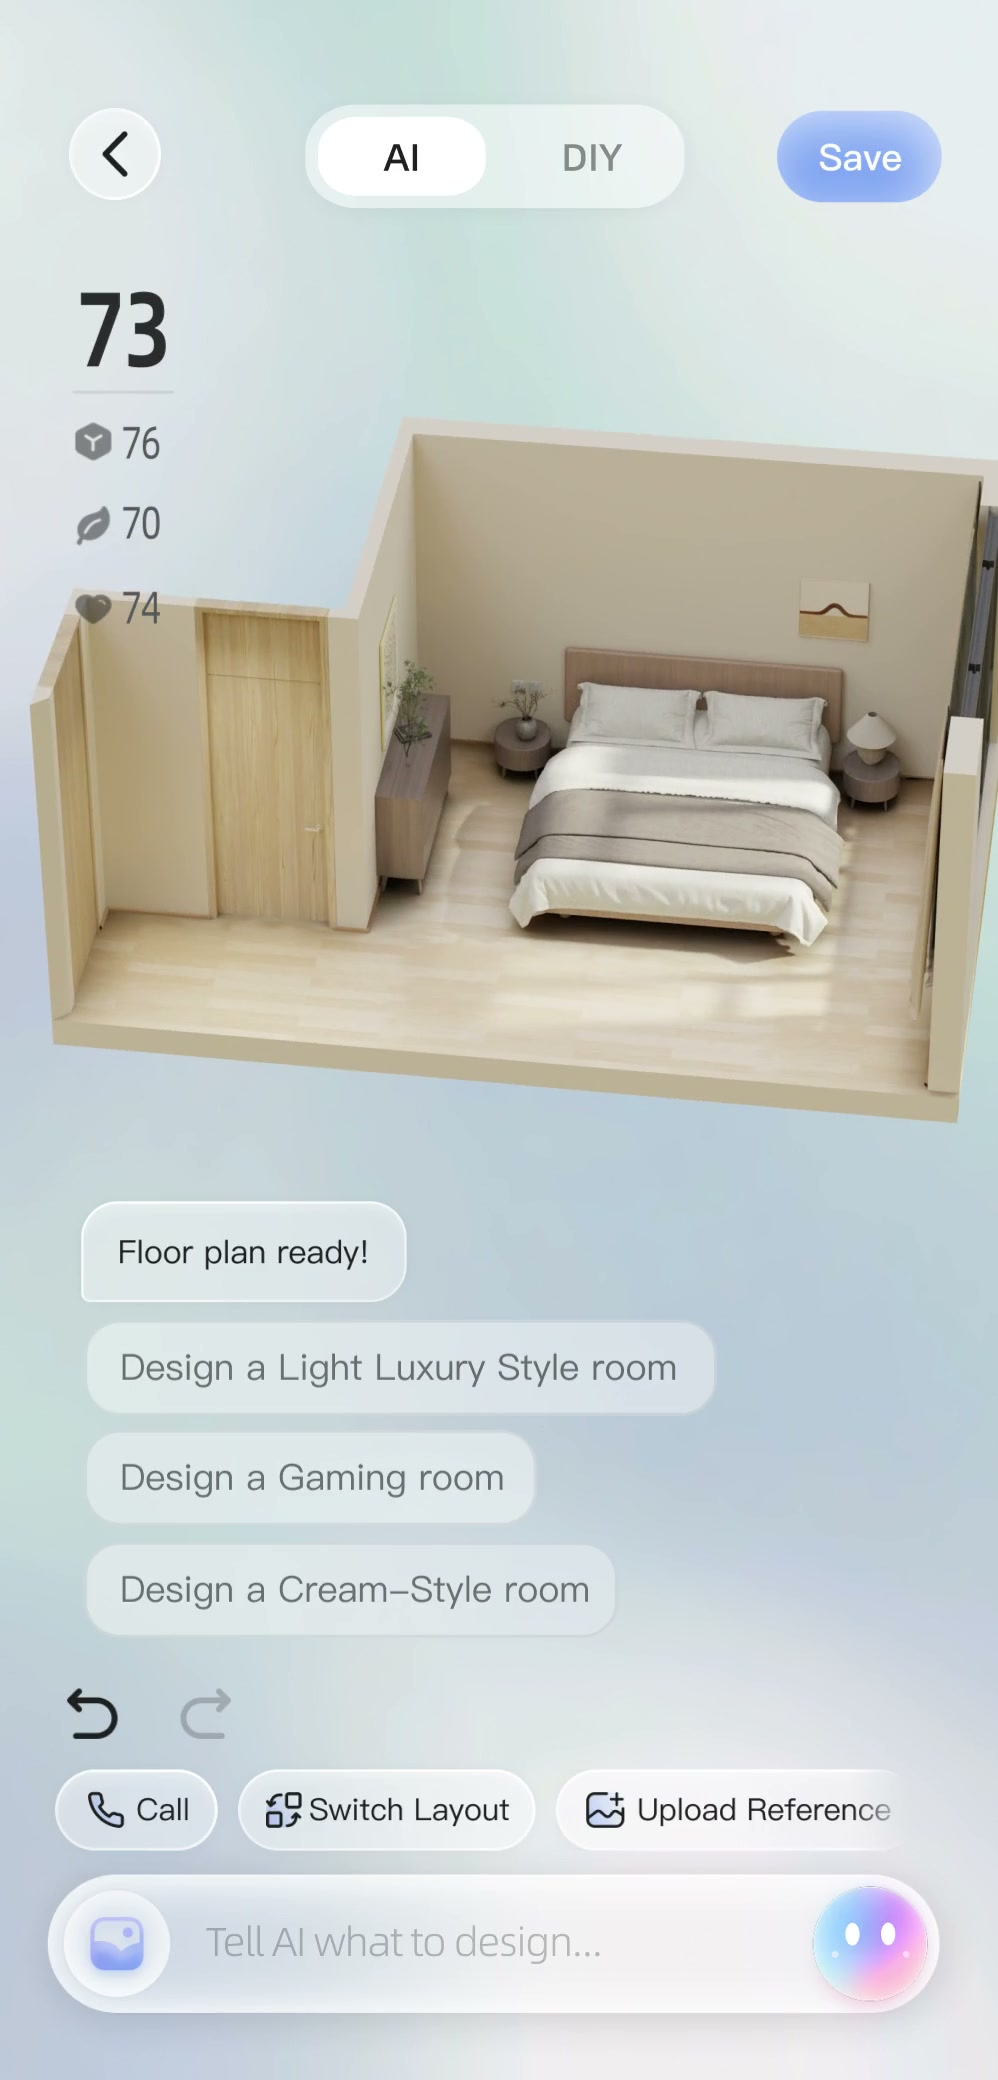
Use a reference photo to give the bedroom a direction
In the example, the room was already set up as a 3D model in the SenHOME app. Using Upload Reference, a photo with a light-coloured bed, warm colours, and a textured-looking wall was added to the conversation. This kind of image helps when you want to furnish a room with AI and already know the atmosphere you want. The reference gives cues for colour, finishes, and light. Then you can assess the furniture arrangement in your own room.
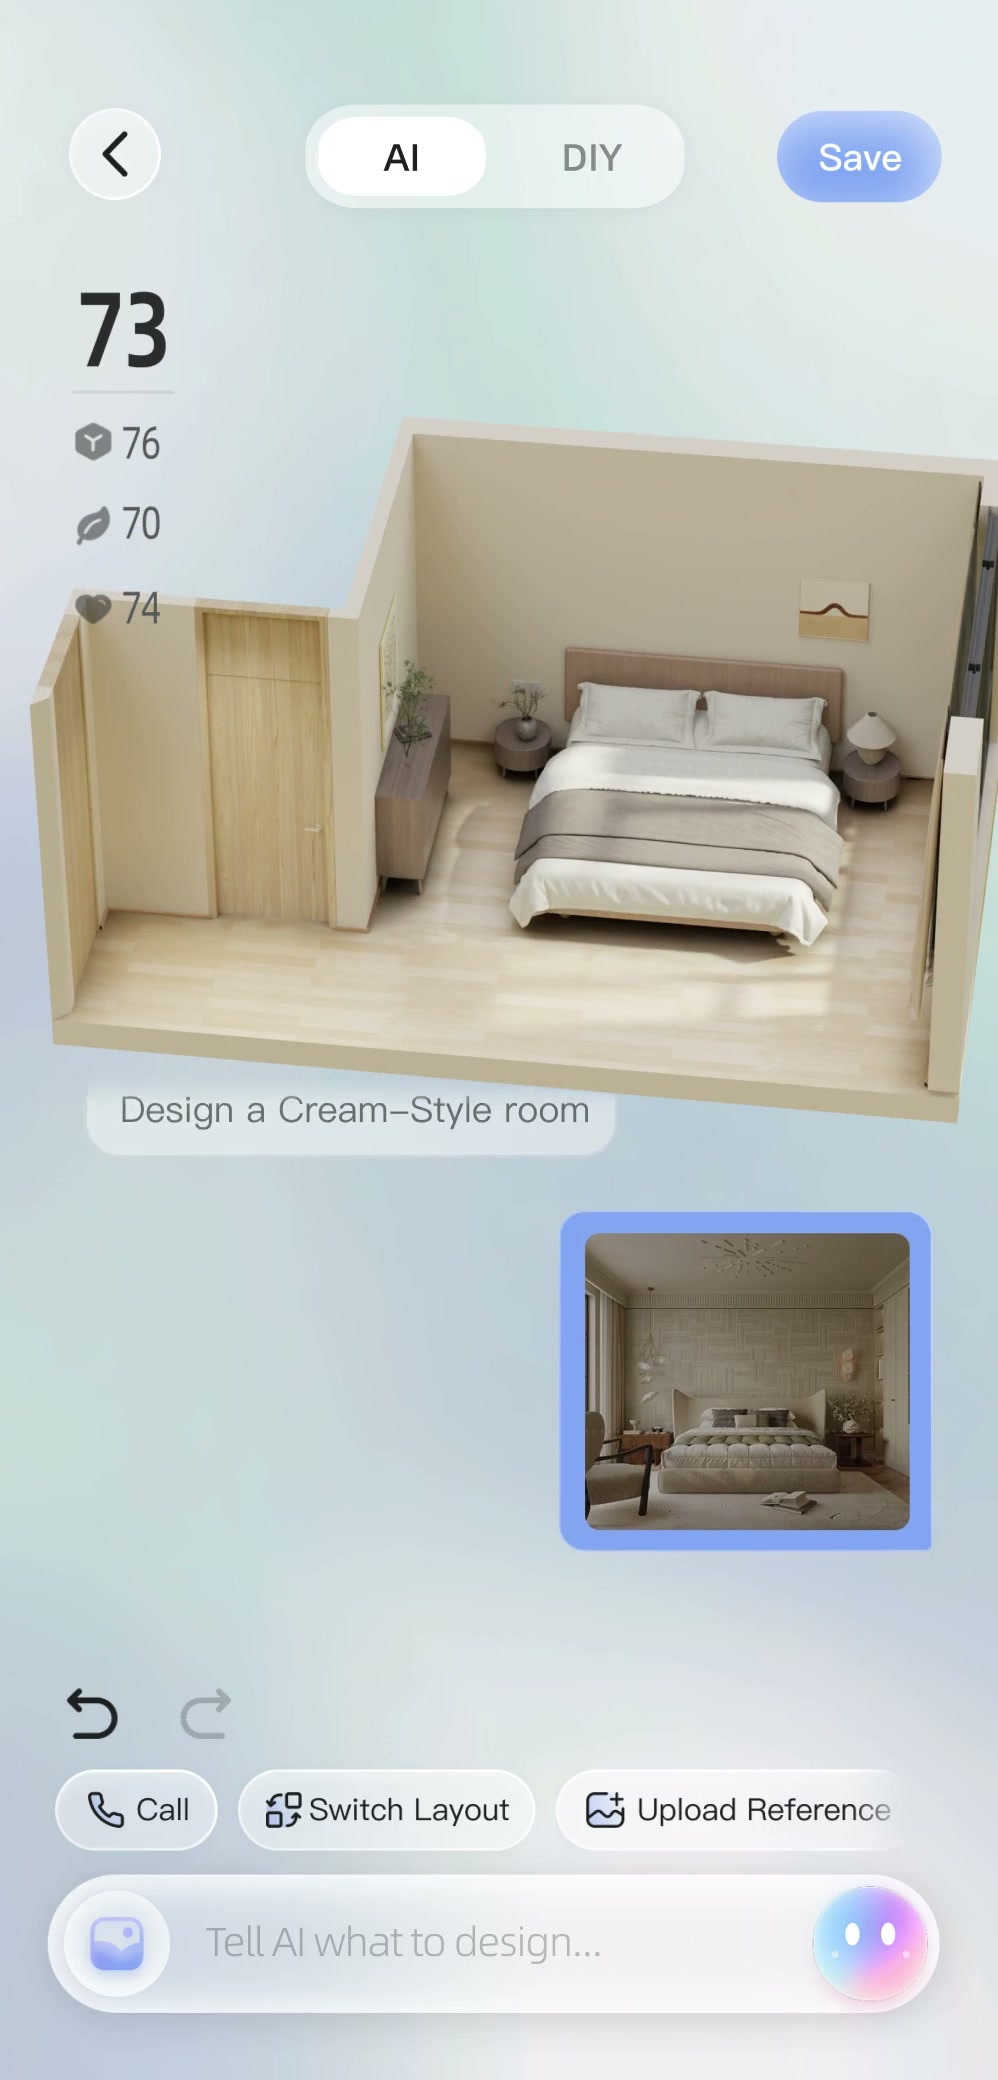
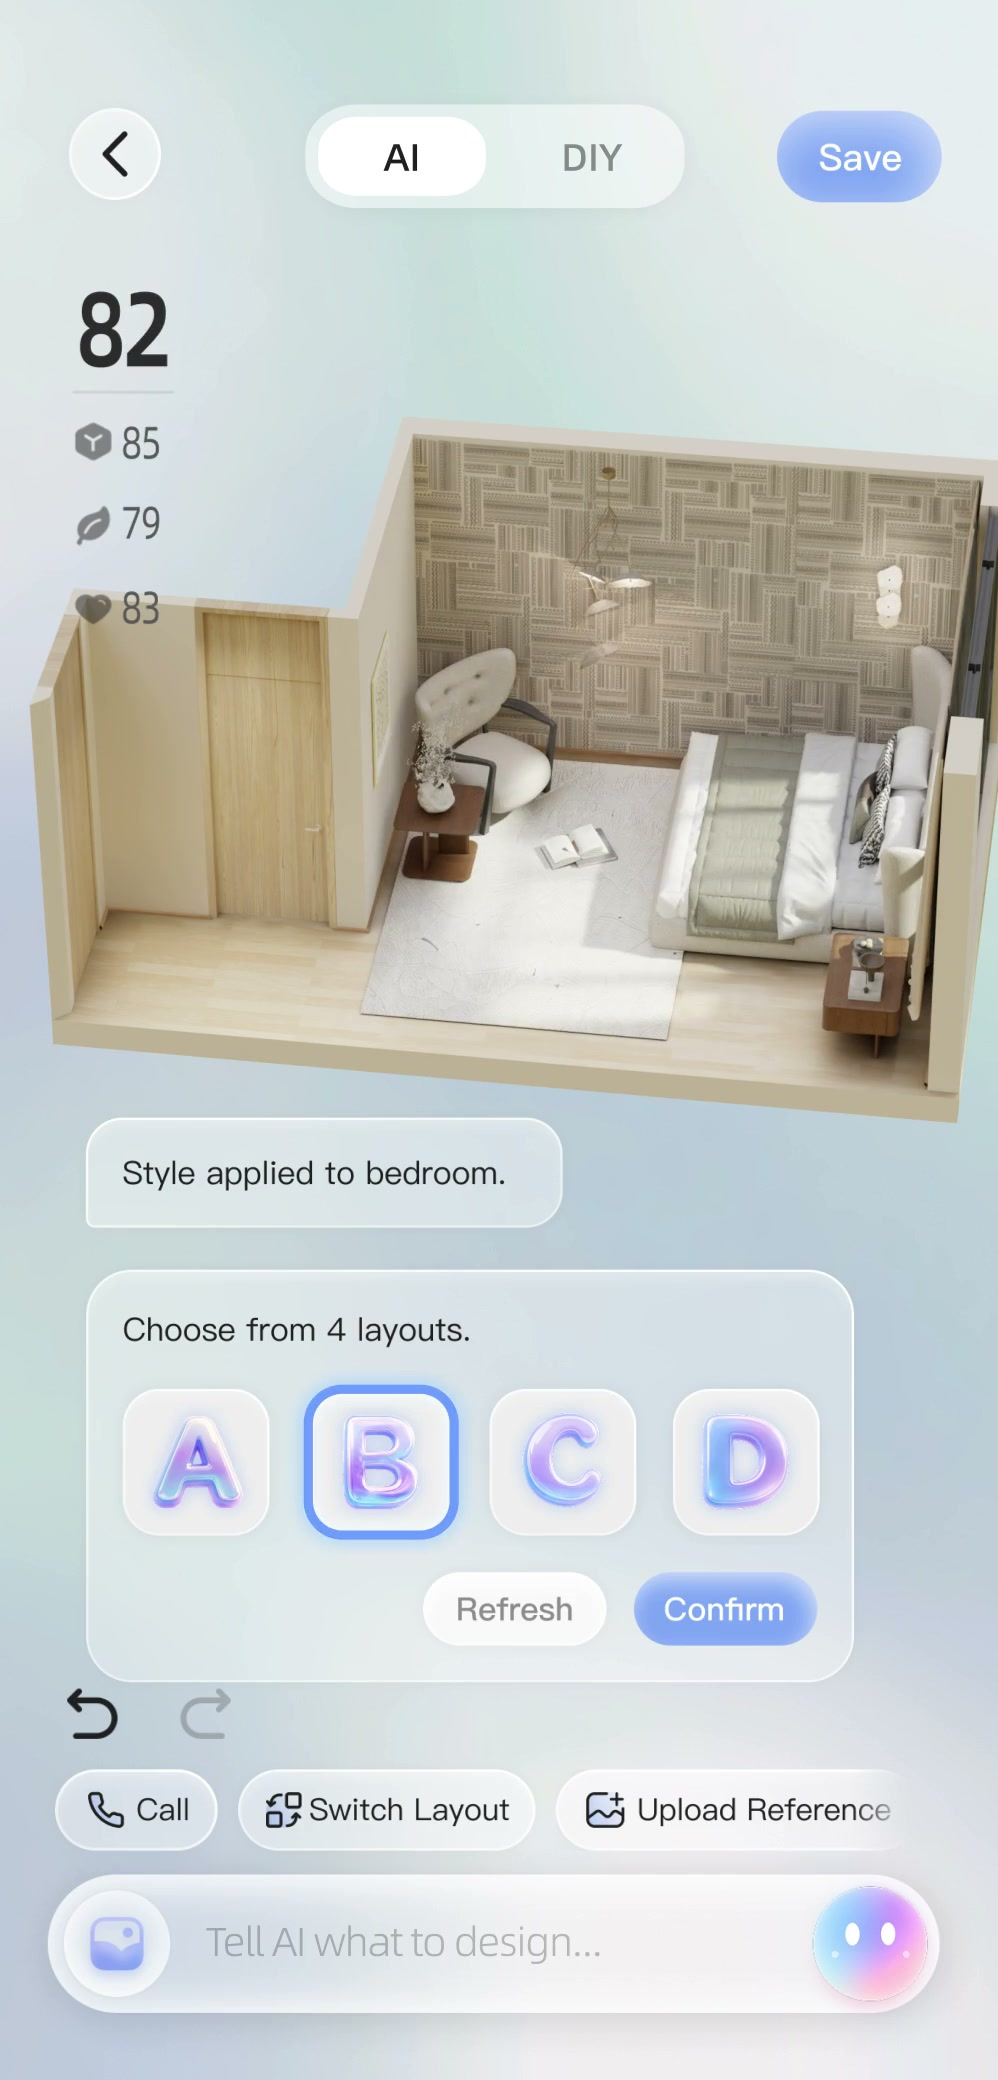
Two furniture arrangements for the same room
The recording shows four available layouts. In Option B, the bed is turned across its original direction and sits on the right. The light armchair is to its left, close to the back wall. The light carpet connects the two areas. This arrangement brings the seat closer to the wood-toned cabinet fronts.
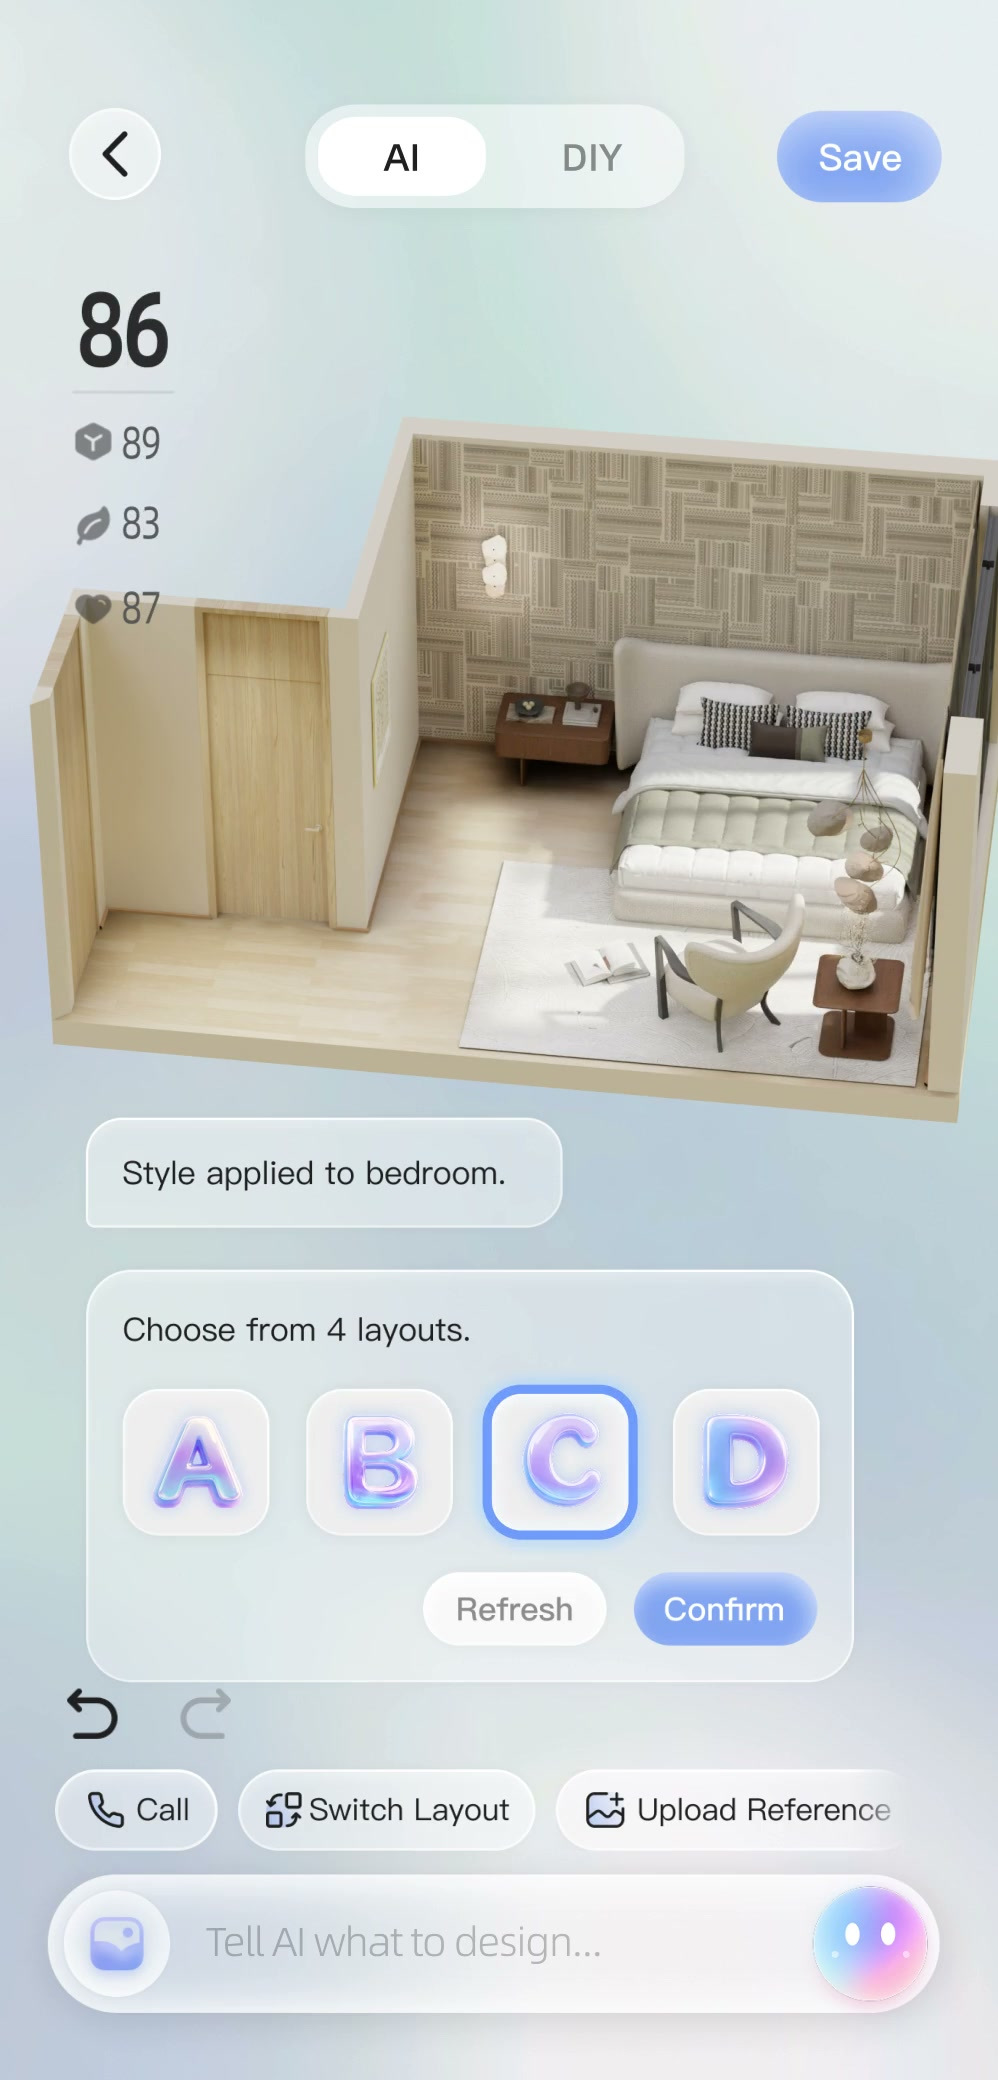
In Option C, the foot of the bed faces forward into the room again. The chair sits at the front edge of the rug. A dark side table adds an accent beside the bed. This is the option chosen for further editing in the video. Use Confirm to apply the selected design.
Review the details in DIY mode
After the selection, the recording moves into DIY. The chair is selected directly in the 3D model. The controls show how its position or direction can be adjusted on its own. Check the proposed route to the bed and the space in front of the wardrobe at this stage, before deciding on the arrangement.
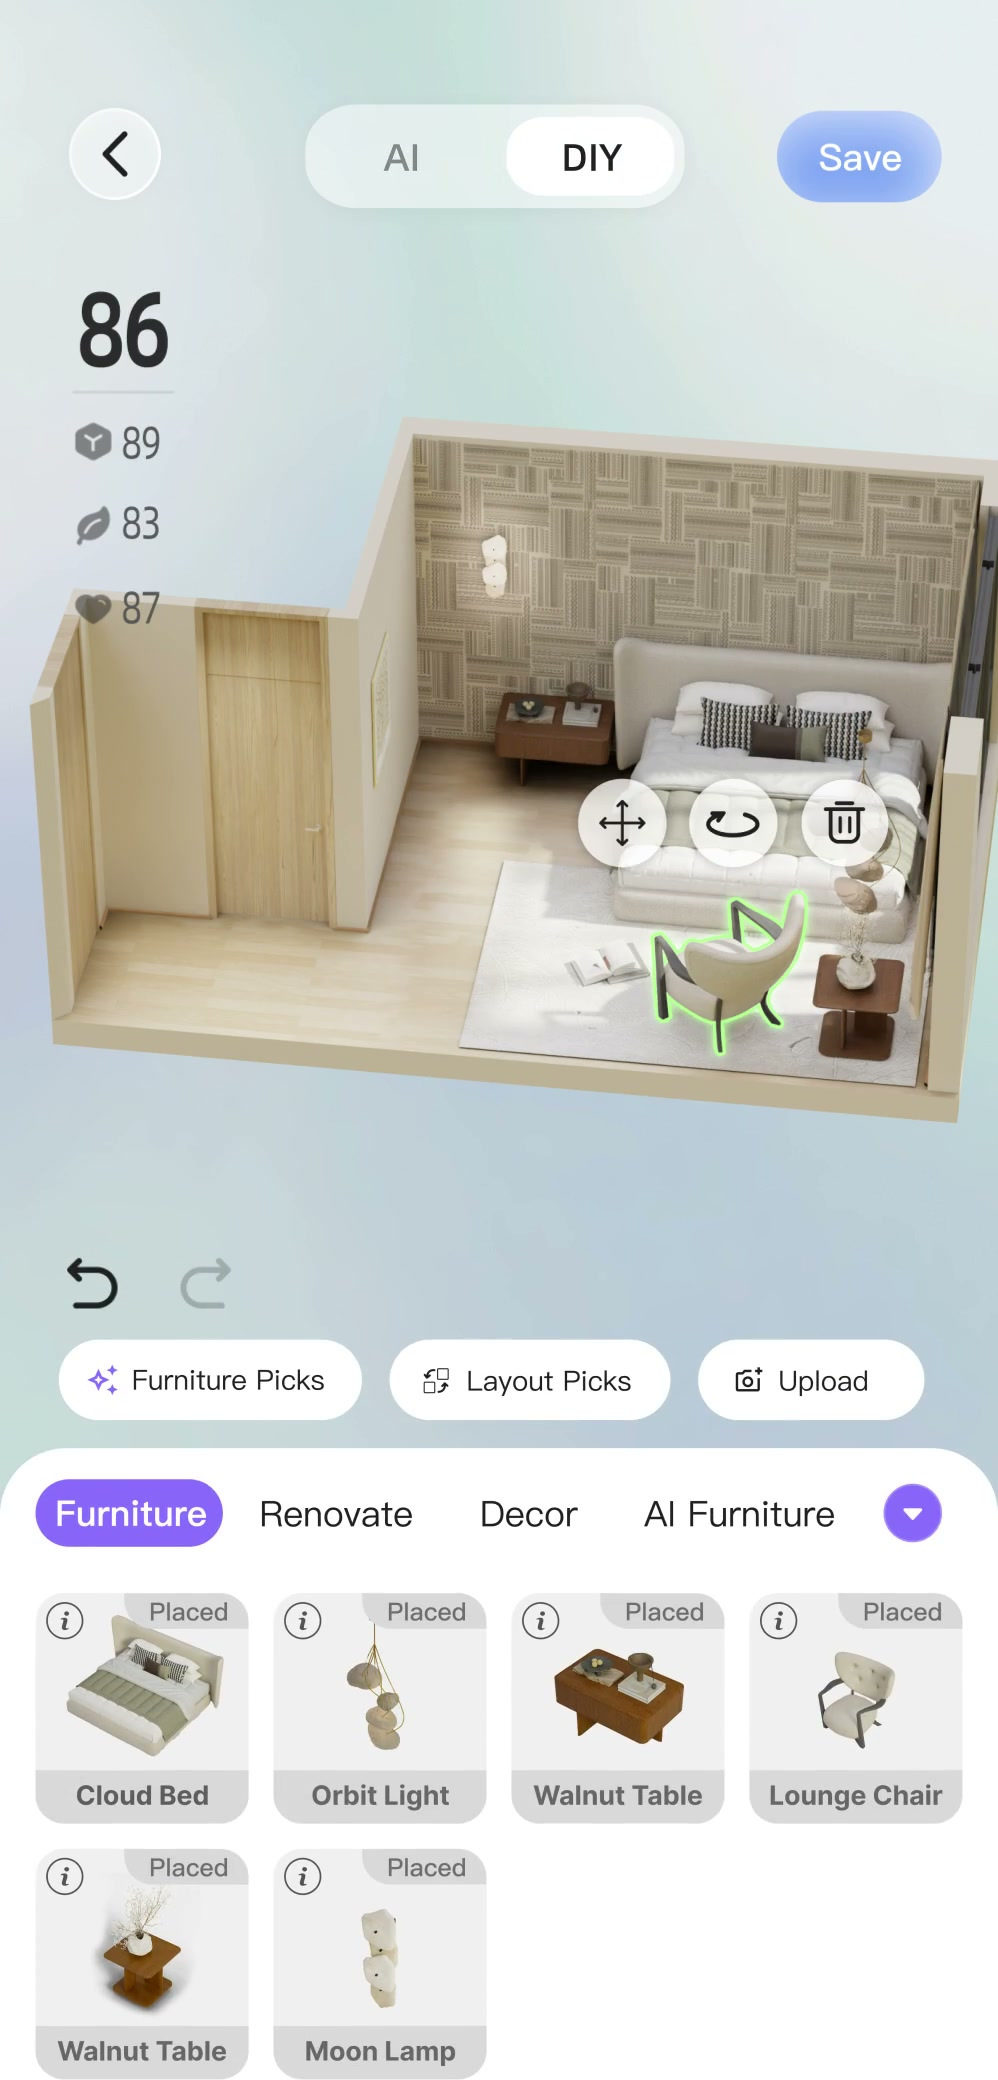
The images show a furnishing preview in the app. Before buying, measure the bedroom with a tape measure and compare the available space with the dimensions of the bed, chair, and wardrobe. To try the workflow from input through editing, follow the SenHOME guide to AI interior design.