Quick answer
Open your room model, select the wall surface and try a suitable finish from the material library. Compare the starting and trial versions from the same camera position with the furniture kept in place. This helps you judge the wall colour alongside the floor, curtains and furniture. Confirm the shade with a physical sample in the room.
1. Prepare a starting view
Open the room in SenHOME Web and choose a viewpoint that shows the wall and the main furniture. Check that the windows, floor and furniture match the comparison you want to make. Note the starting state. Keep the other surfaces unchanged at first so you can see the wall’s effect.
2. Select the wall and material category
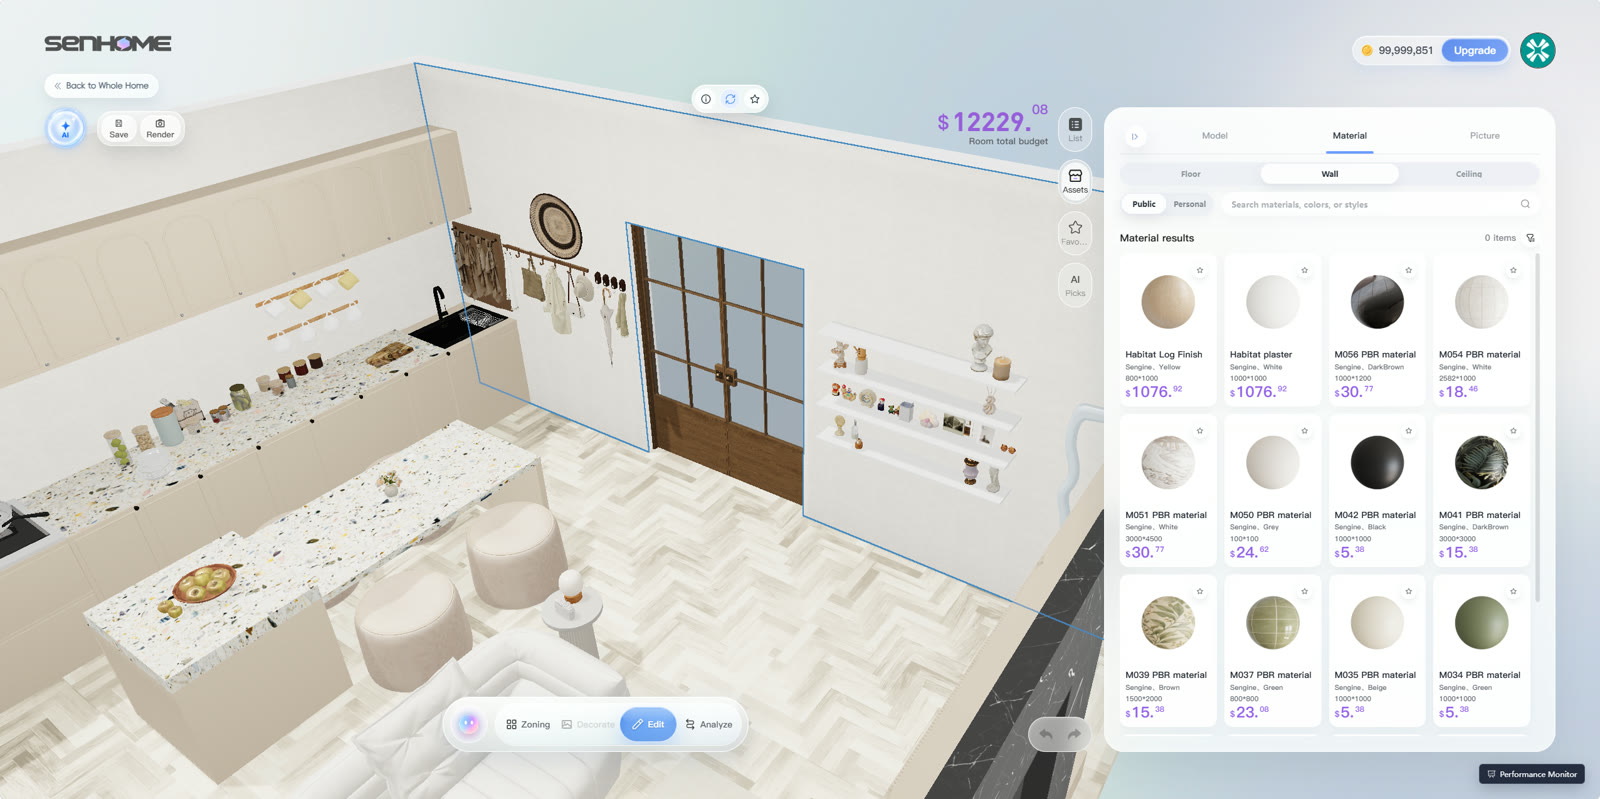
Select the wall in editing mode. In the illustrated English interface, its boundary is marked in blue. The open Material section contains the Wall category and finish previews. Choose a suitable candidate and check that the intended surface has changed. Pay particular attention to wall sections beside windows and doors so you compare the right surface.
3. Compare two finishes from the same viewpoint
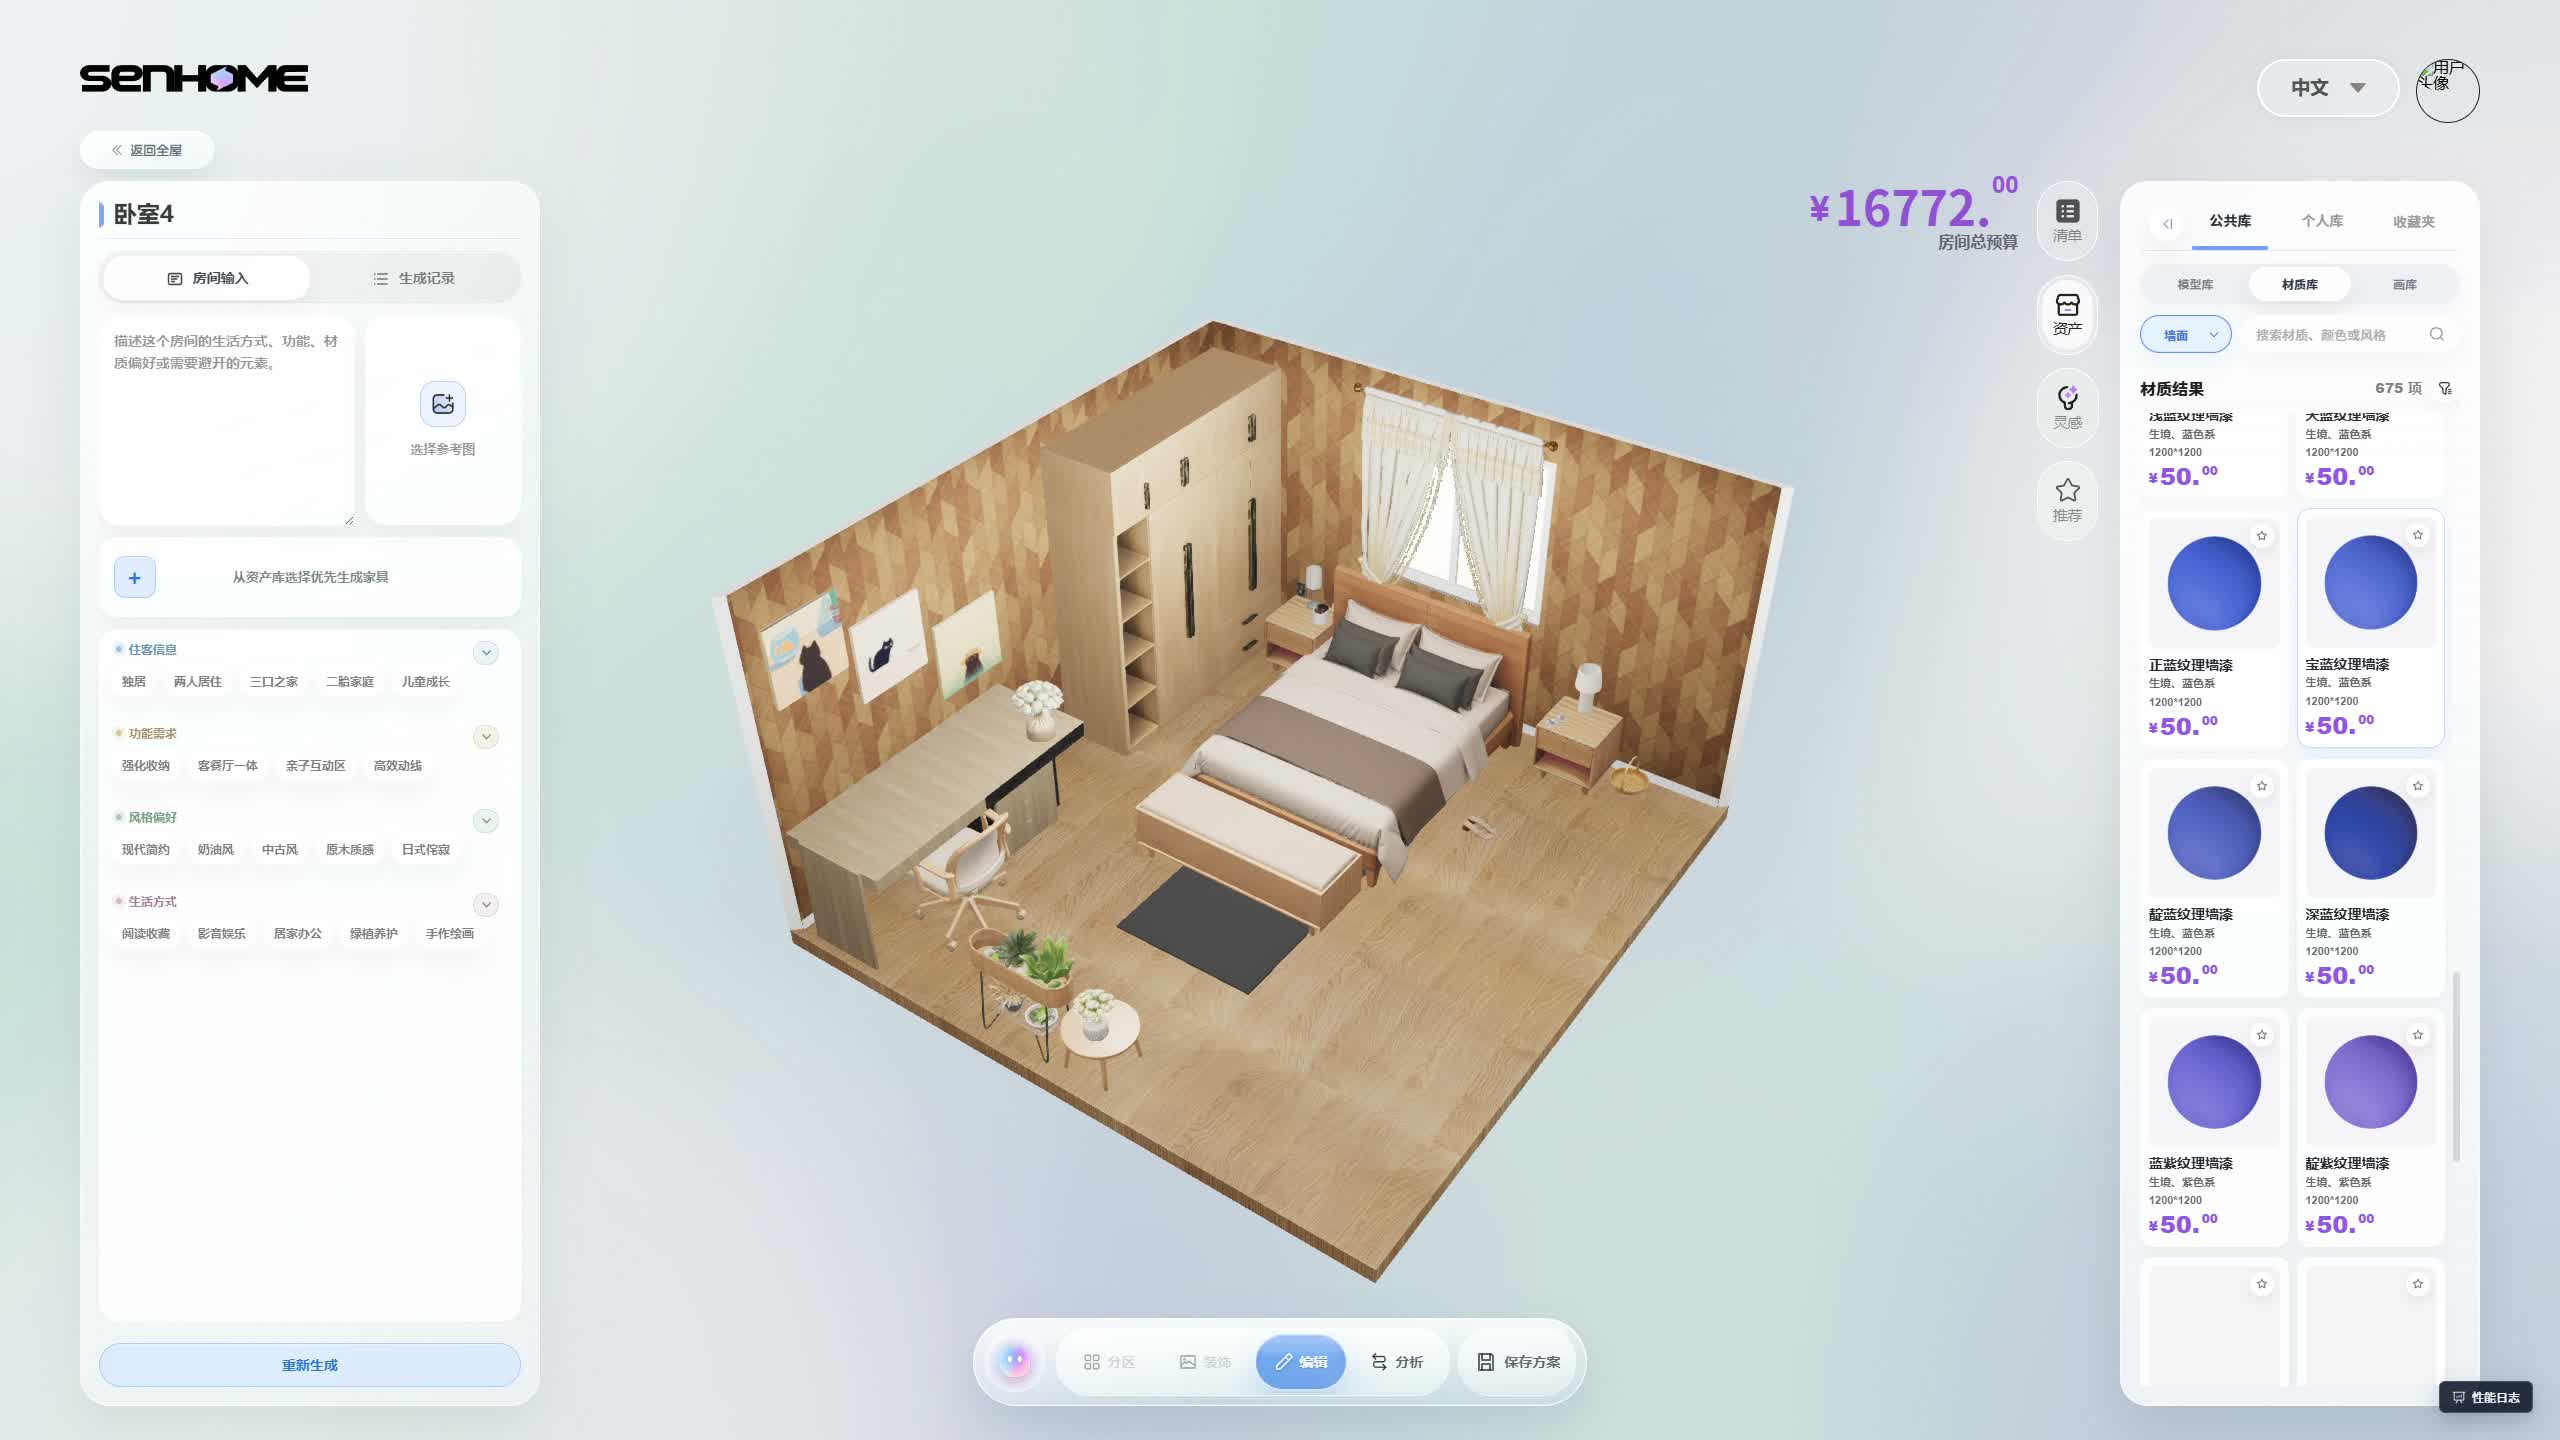
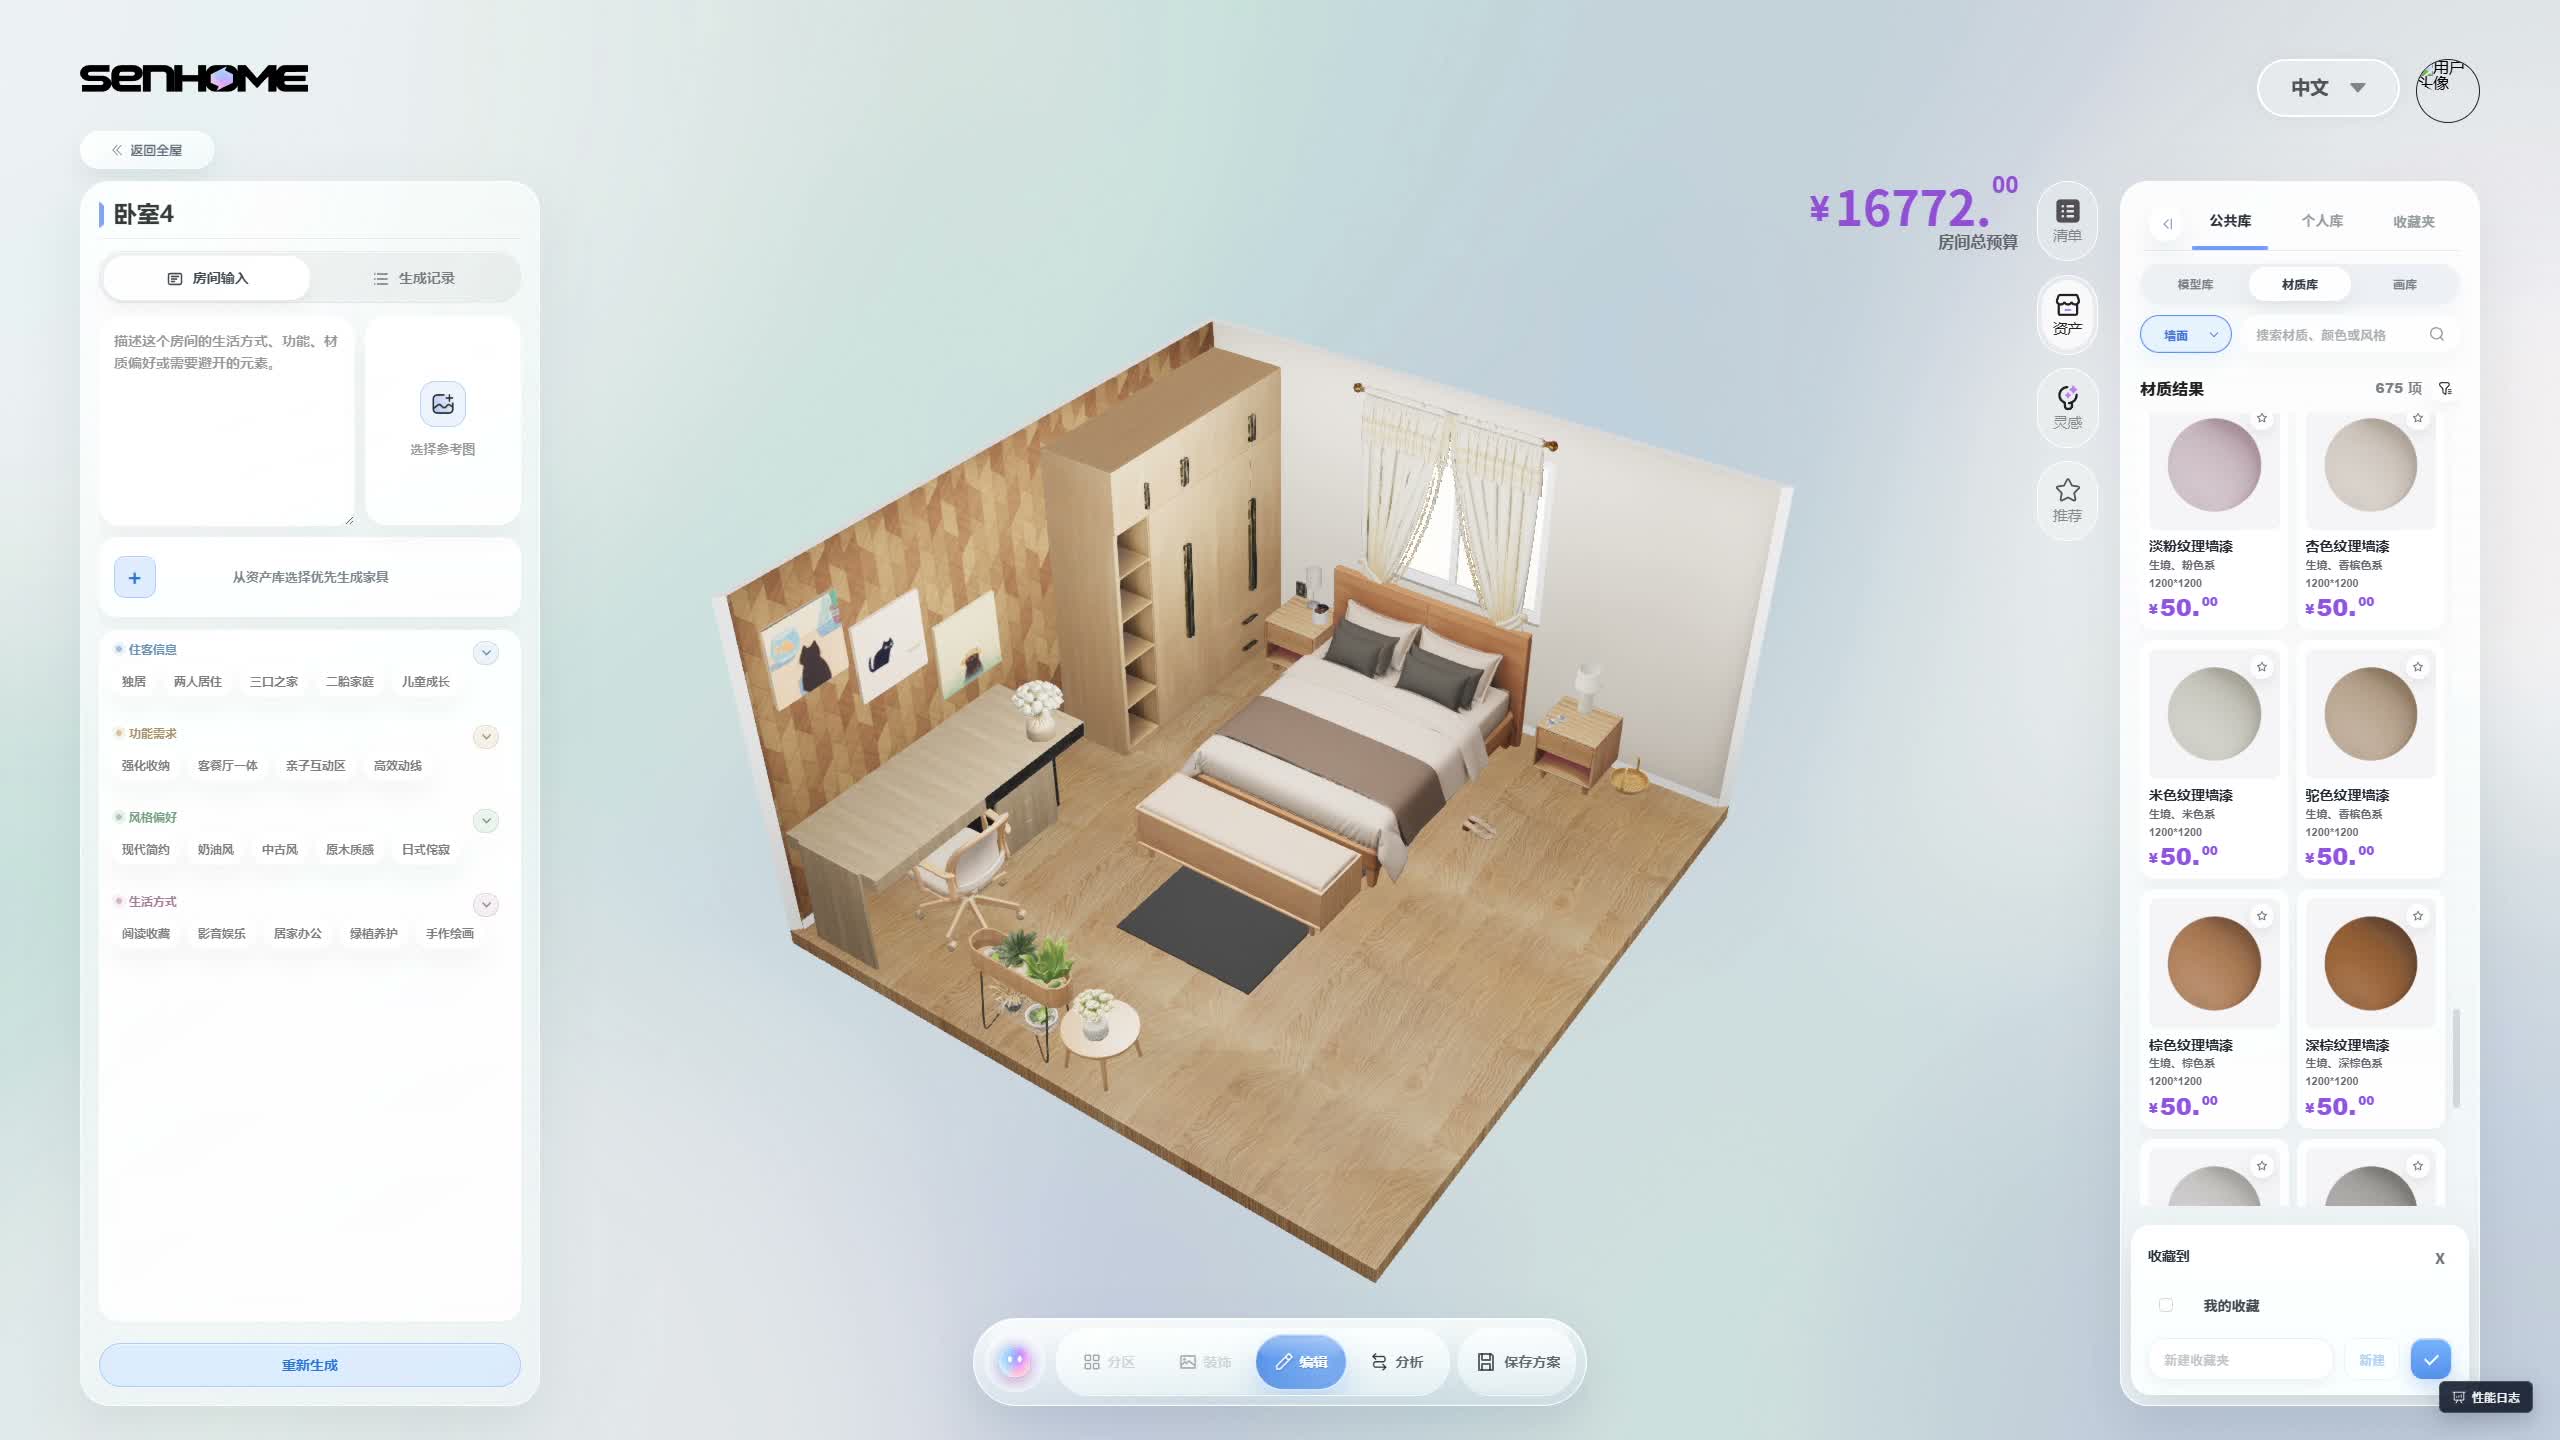
Switch between the starting and trial versions for comparison. Keep the camera, furniture and other surfaces as consistent as possible. The following Chinese-language bedroom recording shows this approach in another room. Both visible walls have a pattern first, then the window wall becomes light. Compare the area beside the wardrobe, the curtains and the bed frame in both images. Describe the change in one sentence, such as how the light wall looks next to the existing wardrobe.
4. Check the choice with a physical sample
Note the selected finish and place a colour sample on the intended wall. Look at it by the window in daylight and under your lighting in the evening. Hold curtain fabric or a furniture sample beside it too. Judge brightness and colour at that particular location. The guide to comparing room changes helps you test further decisions one at a time.